Pictorial Syntax
We usually think of syntax as the way we arrange words and phrases in order to make sentences that communicate meaning. But the idea of syntax can be applied to making gum prints, as well. In other words, there’s a gum bichromate pictorial syntax.
William Ivins, Curator of Prints at the Metropolitan Museum of Art from 1916-1945, was the first to apply syntax to printmaking in general. In his influential Prints and Visual Communication (1953), he called it pictorial syntax. Each of the traditional printmaking methods (engravings, mezzotints, etchings etc.) has certain “rules of the road” that allow the printmaker to get the most information or the best effect from each medium (wood, metal etc.). Those “rules of the road” define the syntax of the medium. And in turn they also define the “trace” (or the hand) of the printmaker.
Mechanical Reproductions
But when Ivins compared those printmaking methods to photographs, he concluded photography has no syntax. Photographs, he argued, are mechanically produced images that are chemically (or digitally) developed into a perfectly reproducible print. There is no trace, and therefore, no syntax. Post-modernist philosophy has had a field day with that sort of mechanistic view of photography.
Regrettably, I take his point regarding the original source — the negative or digital card. Even the original inventors of photography didn’t know how to describe their role in the making of photographs. Does nature make the photograph or do I?
The ability to replicate the scene before the camera, much less the ability to make exact replicas an infinite number of times from one original in-camera photograph, has always been photography’s Achilles’ heel as a recognized art form.
Hands-on Photography
Critics of photography hold that photographs are mere products of the Machine Age, not art. And in this Age of smartphones and social media in everyone’s pocket, there’s an argument to be made there. But Ivins’ definition seems to have discounted the many hands-on methods like the gum bichromate process that have been around since the first decades of photography.
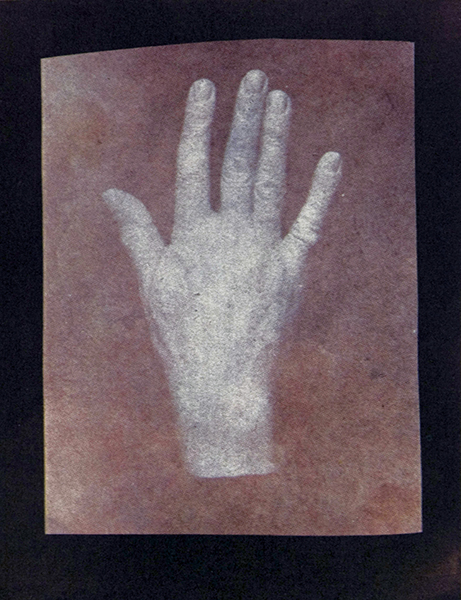
Gum bichromate photography defies mass reproduction. It allows the photographer to not only “take” a photograph — the one made in the camera at the push of a button, the one that can later be reproduced infinitely. But further, to “make” a unique, one-of-a-kind print that very much bears the trace of the hand and the method that made it.
More than one gum print can be made from the same negative, of course. But it’s close to impossible to make a gum print that looks exactly like another one. (I’ve tried with some of my favorites over the years.) There are just too many variables that factor into the process. Too many “touches.” Those variables are the building blocks of the gum syntax.
From the weighing and mixing of multiple ingredients in small quantities, to how the emulsion is brushed on, to the water temperature of the developing bath, to the ambient humidity, and the pigments used, to water sprays and cotton ball dabbing, even the very source of light used to expose the print: indoors under a bank of uv lights, or outdoors under the sun. All effect the final outcome of a multi-day process. In the end, a gum print is anything but a push of the button reproducible machine age print.
Transformation
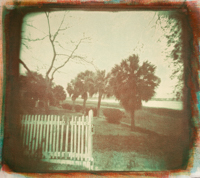
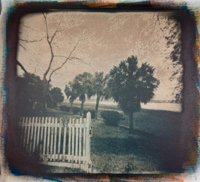
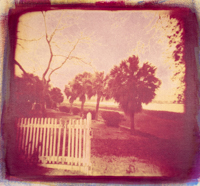
To be sure, the final layer, the finished print, still carries the sign of the original photograph, the one captured in the camera, but it’s no longer the same. Gum’s syntax is defined by those value-added post-camera decisions. The layering of pigments exposed over days and weeks applied with unique brush strokes and chemical and hand manipulations, all establish a new, more personal, more archeological sense of time. Less a representative photograph and more like an old memory or a dream one can’t quite remember.
My process
The life of one of my gum prints begins with the in-camera image. The one written with light, chemistry and the push of a button. I love film, black and white photography, and framing the world in squares. So my first preference is to photograph with a medium format camera loaded with 120 black and white film.
But sometimes the world just can’t be squared. For those moments and places, I also carry a 35mm camera (rectangular frame) as well. But other than the shape of the image, what kind of camera you use or what kind of film or digital source you create is not as important to the making of a gum print.
In the darkroom, exposed film is processed and dried then a contact sheet is made that supplies the first positive look at the images. Those of interest are made into 5 x 5 black and white RC work prints. From those, I choose the images I want to try my hand at gum printing.
But to do that, a new “gum negative” will need to be made from the original. 30 years ago I made gum negatives in the darkroom with my enlarger using reversal film and an A+B Lith developer. But today, I scan the original negative into the computer where I can make changes to suit the needs of the process. Gum negatives, whether the original photograph was black and white or color, are black and white negatives. They are typically a little lower in contrast and enlarged to the size of the desired gum print. So even before I’ve started my gum print, I’m working with a different source negative than the original.
Trace
The paper I use for printing is Fabriano Artistico. It’s made with water colorists in mind but it’s a wonderful paper for printing gum. Before being gum worthy, the paper needs prepping called sizing. Soaking the paper in a bath of gelatin to create a surface for the image to fix. I like the hot press traditional white for its smooth texture. It comes in a 300g, 22″x30″ sheet that suits my needs and at full size, fits in a few of my trays.
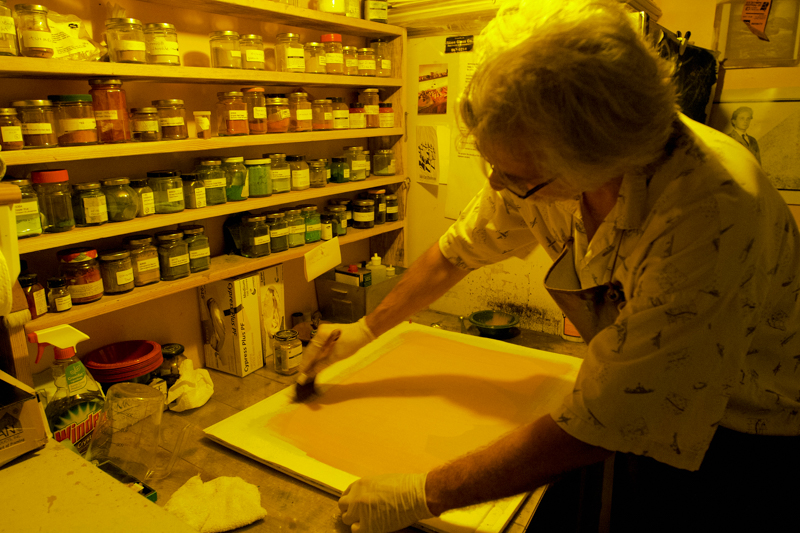
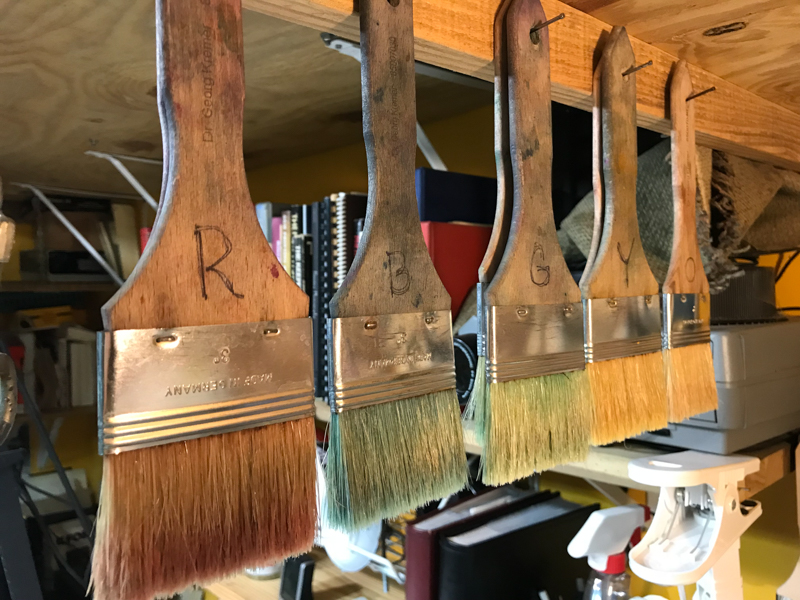
I print with a single negative using potassium dichromate, gum arabic, and ground earth minerals for pigmentation: ochres, siennas, cobalts, and ultramarines . Quantities of each are weighed out in grams0000Most finished prints have been exposed to light 8-12 different times. Each of those brushed on layers adds new color, contrast, and depth of texture to the print.