It has been said that there are as many ways to make a gum print as there are gum printers. That’s hyperbole of course but it points to a fundamental reality about gum printing. The rules of gum printing are mostly suggestions. Mere starting points for developing your own best practices. And as a result, anyone who sticks with it, develops their own unique style of gum printing.
I first started playing around with alternative photographic printing methods in the late 1980s. Cyanotypes provided the gateway, they’re easy to like and easy to make. Albumen prints, in addition to providing a very 19th century black and white look, your home takes on a very laboratory-like look with bottles of liquid silver nitrate and large bottles of fermenting egg whites used to precoat any fine writing paper But what can you do with all the leftover yolks?
Working from David Scopic’s The Gum Bichromate Book, published a few years earlier, a couple of chapters from some of the few “Alt” books that were on the market at the time and some research in the Library of Congress, I began my life as a gummist.
There are two main branches of gum printing: 3-color gum printing begins with 3 or 4 black and white negatives representing cyan, magenta, yellow and black (CMYK). The general goal of a three-color gum print is a full color hand-made photograph. I’ve never been a fan of color photography so I don’t print that way.
I use one full range black and white negative over and over again. Pigment selection from layer to layer is completely arbitrary with results ranging from realistic to whimsical.
Beginning with an enlarged black and white negative, gum bichromate prints are made by coating printmaker’s paper sized in gelatin with a mixture of tree sap, pigment, and potassium dichromate. Gum arabic (the tree sap), derived from the acacia tree, acts as a colloidal (sponge-like) agent for holding the light-sensitive dichromates and pigments together. I mostly use mineral pigments taken from the earth (Italian and German soils are favorites) but other materials round out the palette – things like walnut hulls gathered from nearby woods, turmeric from the kitchen, and others imported from afar like sandalwood and indigo.
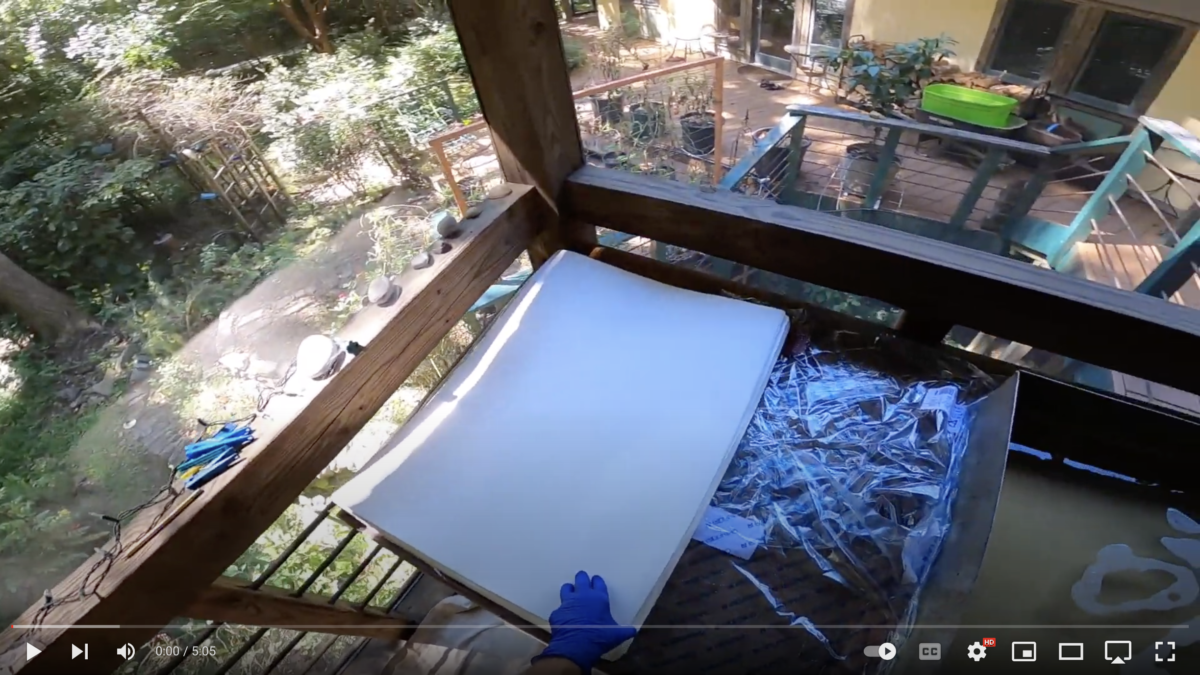
I make these prints by brushing the pigmented mixture indoors under low light, attaching the black and white negative then exposing the print to sunlight outdoors or a bank of UV lights in my darkroom. During exposure, gum arabic is transformed from a water-soluble to water-insoluble material according to the amount of light received. After exposure, the negative is removed and the print is then placed face down in a tray of water, allowing the least exposed areas of the print to fall away from the brushed surface. When “enough” pigmented mixture has fallen off, the print is hung out to dry. This process is then repeated on another day using other pigments. Most images take a week or more to create.Most are printed more than six times and upwards of a dozen or more times, resulting in a full-scale print of beauty and permanence.
I made my first gum prints in 1990. They didn’t look like Edward Steichen’s or any of the other gummists’ work I’d encountered in books and museums. The learning curve was clearly steeper than the other methods I’d been experimenting with. But I was hooked.
I put together a 5′ video (no audio)that shows my process beginning with the once a year ritual sizing of all the paper I’ll need for the upcoming year and then going through color selection, brushing up and developing. You can link to it HERE.